

In today’s digital marketing landscape, keeping pace with the latest tools is essential for success. One such tool is the Facebook Pixel Conversion API, a game-changer that helps businesses track and boost their ad campaigns more effectively. In this article, we’ll break down what the Facebook Conversion API is, explore its advantages, and guide you step by step on how to set it up using Google Tag Manager.
Demystifying Facebook Pixel Conversion API
Imagine Facebook Conversion API as a super-smart assistant for your online advertising efforts. Unlike the traditional Facebook Pixel, which can sometimes miss important details, this tool works at a deeper level. It collects information directly from your website and sends it directly to Facebook’s servers. Think of it like having a personal data courier for your ads.
The Perks of Using Facebook Conversion API
Let’s dive into why you should care about this nifty tool:
Sharper Data Accuracy: The Conversion API avoids the pitfalls of ad-blockers and browser quirks, ensuring that the data you collect is precise and dependable.
Respect for Privacy: It’s designed to play nice with privacy laws like GDPR and CCPA. That means you can collect essential user data without stepping on anyone’s toes.
Connecting the Dots: Ever wonder how users switch between devices before making a purchase? The Conversion API helps you track those journeys, so you can see the full picture.
Smarter Ads: With accurate data in hand, you can fine-tune your ad campaigns for better results. That means more bang for your advertising buck.
No More Data Loss: Traditional tracking methods sometimes lose data due to technical hiccups. The Conversion API minimizes these glitches, ensuring you capture all your conversion events.
Now, let’s get practical and walk through the steps to put the Facebook Conversion API into action using Google Tag Manager.
How does the conversion API work?
When we implement Facebook Conversion API, we not only send data from the server but also from the client’s browser. Facebook uses a method called deduplication to avoid duplicate tracking from server and browser. We send a unique event id with each event when detected from server and browser, Facebook removes the event sent from server.
If the event with the same event id is not detected from server and browser, it doesn’t deduplicate anything. Further details can be found here.
Setup a Google Tag Manager Server Container
Head to your Google Tag Manager web container and navigate to admin and click plus (+) icon on top of the container settings.
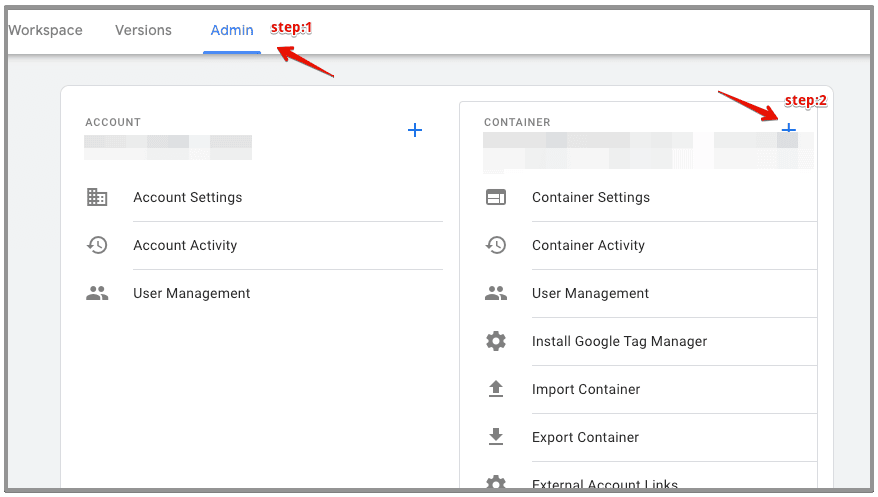
Note: you should have admin access to the web container to create a new container
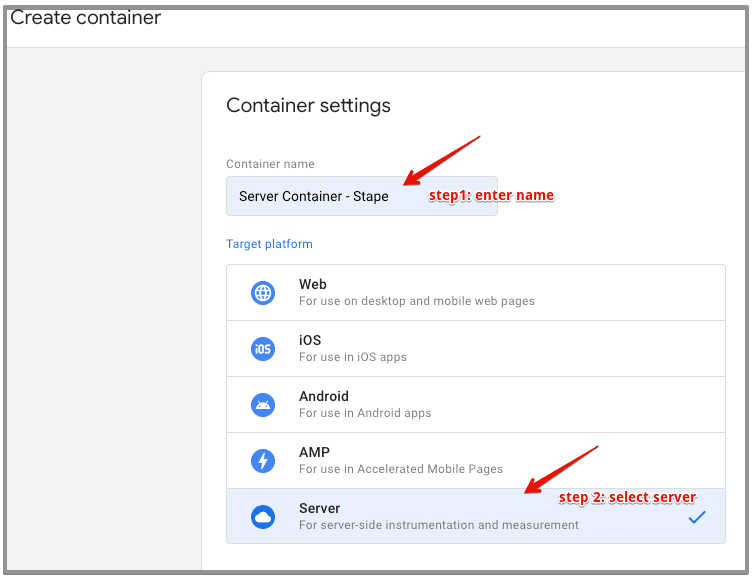
Enter server container name, select server from the options and hit create.
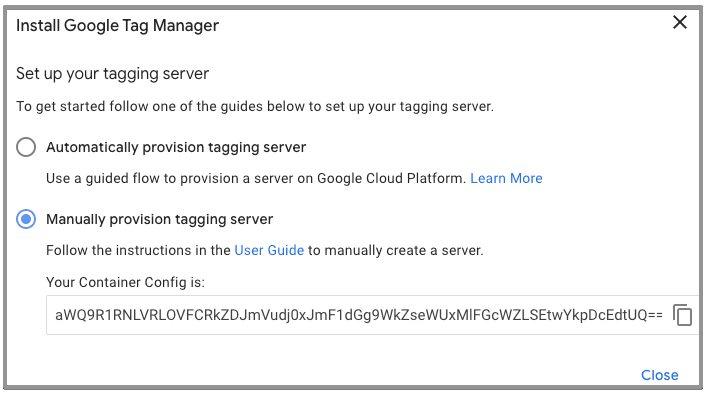
On the next screen, select manually provision tagging server option, copy the container config and hit close.
Connecting your server container with stape
Login to your Stape account.
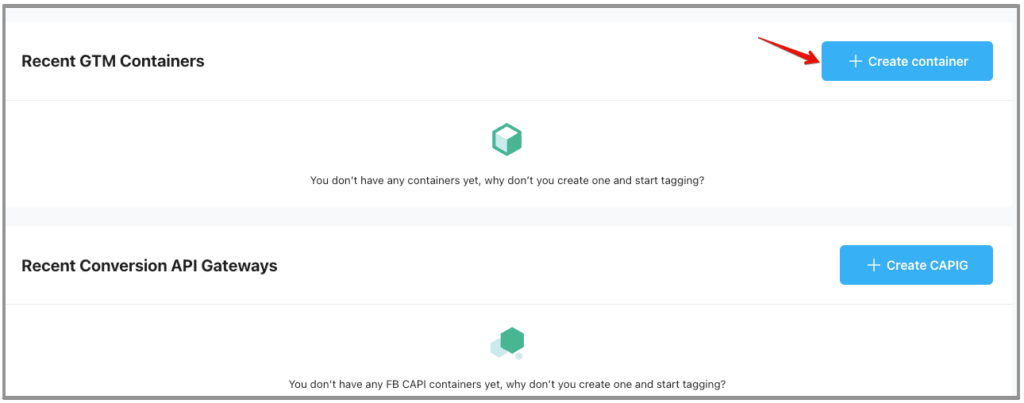
Create a new SGTM container
On the next screen, enter container name, config and select server location.

Next enter your billing details or continue with the free plan.
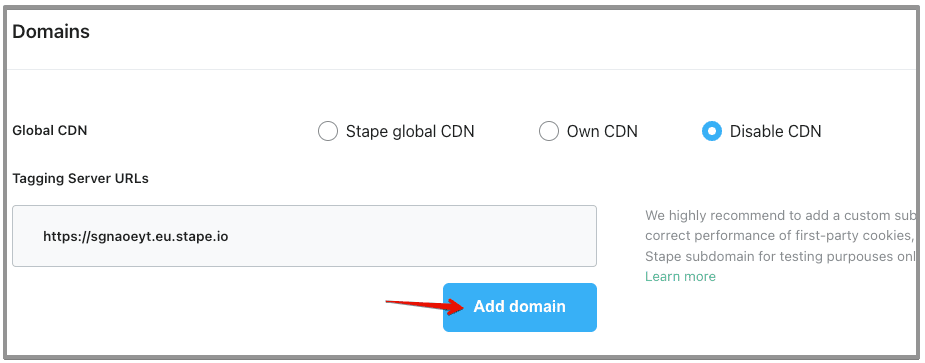
Within the Stape dashboard, scroll down to domains and under tagging server urls, press the add domain button.
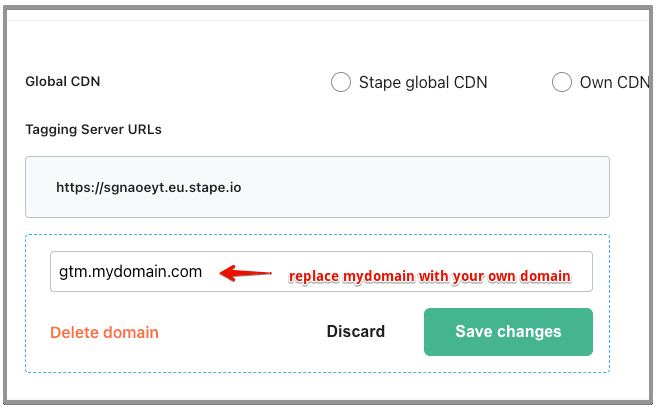
In the domain section, you have to create a sub domain url. In my case I usually enter gtm.mydomain.com. Replace mydomain with your domain name and save.
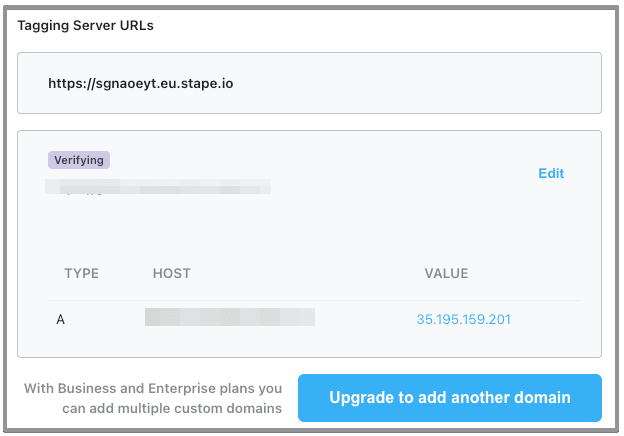
Once you save it, you need to add a new DNS record in your website hosting according to the instructions. It will take a few minutes to verify the changes.
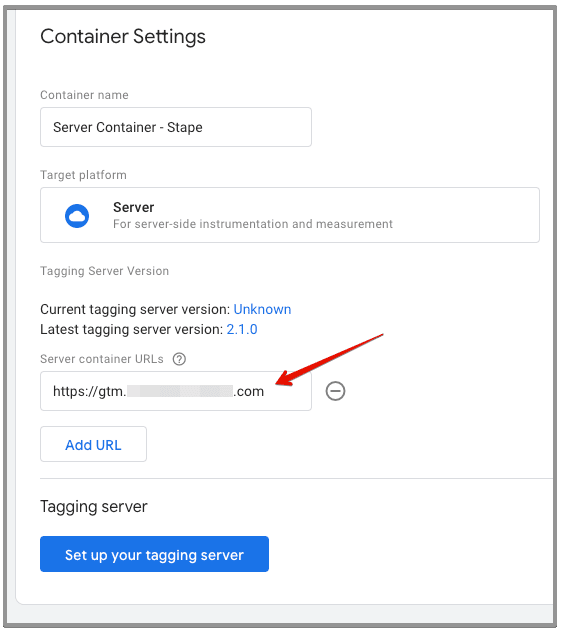
Once the new tagging server url is verified, you need to copy it and navigate back to GTM server container. In the container, navigate to admin and click container settings.
Under container settings, select add url button and paste the tagging server url and hit save.
Now that we have connected the GTM server container with stape, it’s time to implement the tracking.
Installing Facebook Pixel Conversion API
Let’s get into action and implement conversion api using google tag manager.
Step1: Add a unique event id variable in your google tag manager web container.
Download the unique event id variable zip format from here.
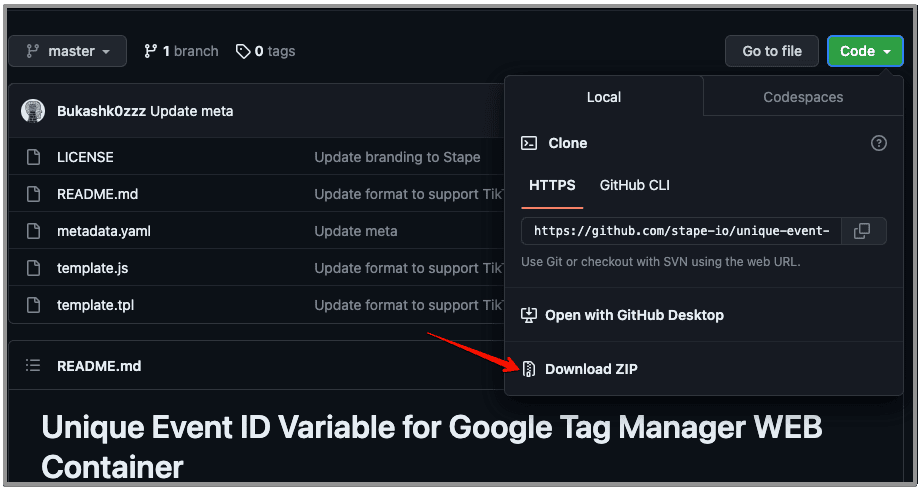
Once you download the file, unzip it. Go to templates in your Google Tag Manager web container.
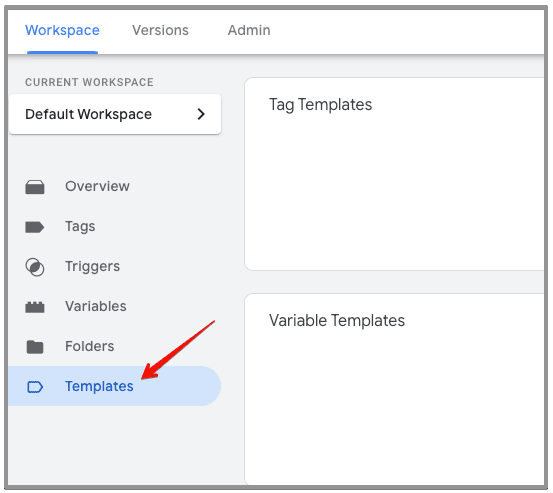
Click the new button under the template variable.
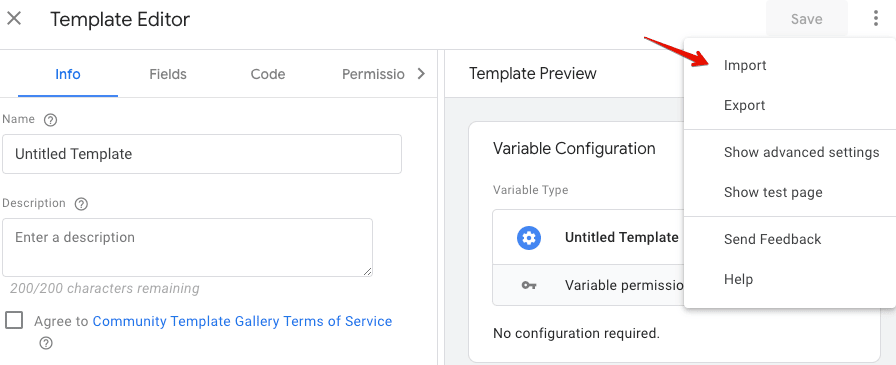
Click the three vertical dots on top right of the template editor and click import.
Step 2: Install Facebook Pixel
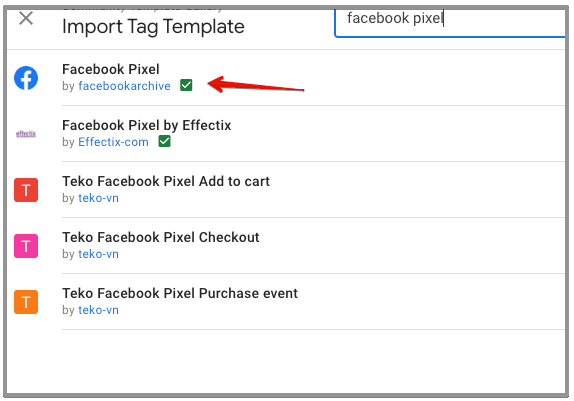
Within your GTM web container navigate to tags and create a new tag. From the tag configuration go to community template gallery and select Facebook Pixel template and add to your workspace.
Once it’s added, go to your facebook events manager copy the pixel id and paste in under the facebook pixel ids option.
Select event name as standard and under events select pageview.
Scroll down click more settings and under the event id option, select the unique event id variable.
Within the pageview tag, click enable advanced matching option. Next expand ‘customer information data parameters’ option and add a parameter
From the parameters drop-down, select external id. From the parameter value option, create a new variable of type first party and enter the value ‘_ga’ and save it.
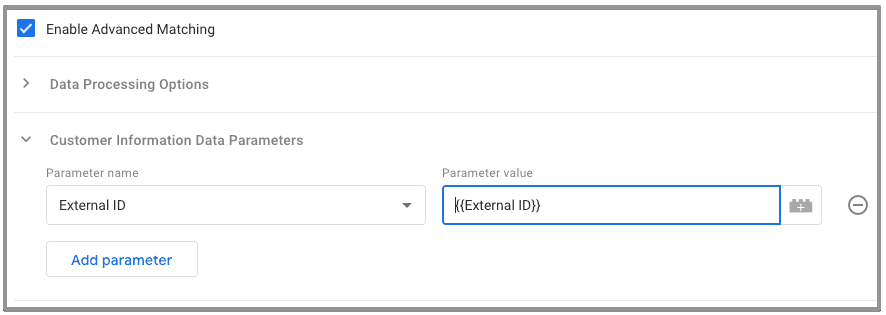
You can pass other customer data if available in dataLayer, otherwise leave it.
Your pageview tag should look like

Add the all pages trigger and save the tag.
We have added a base pixel across the site. The next is to setup an event to track specific actions on your website.
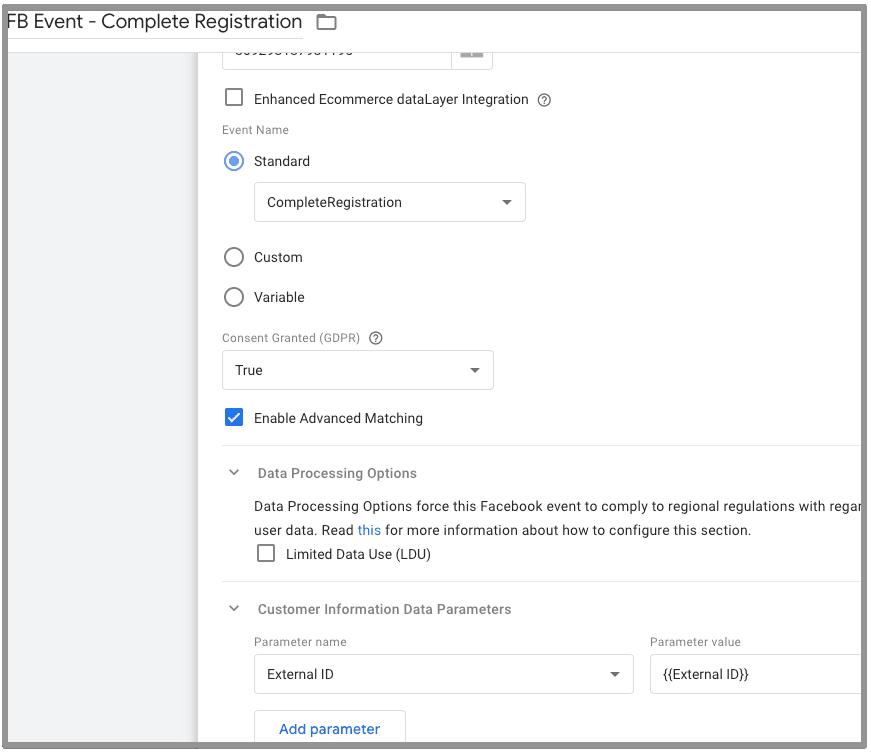
In my case, I am going to add a complete registration event.
Copy the previously created pageview tag and change the event name. Under event name, select the complete registration event. You can select the event you want to install.
Everything will be the same except the event name and trigger.
Send Data From Web Container to Server Container
You can either use GA4 tag or Data Tag template by Stape to send data to the server container.
Follow the steps below to send data using Data Tag.
Create a new tag. From the tag template, goto gallery and select Data Tag and add it to the workspace.
Set the event name to page view. Under GTM server side url, paste the url created in stape.
Add event id and user id as shown in the picture below.
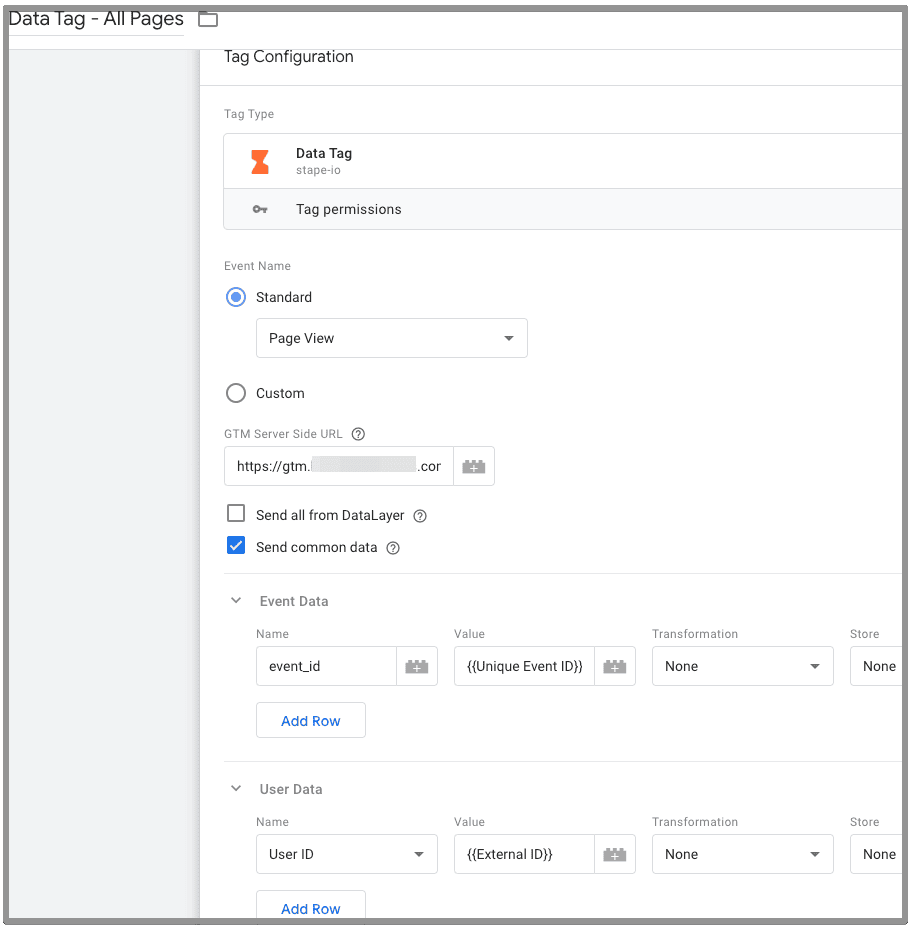
Set the all pages trigger.
Copy the tag and replace the name and event name to complete registration. In this case, the complete registration event is sign up.
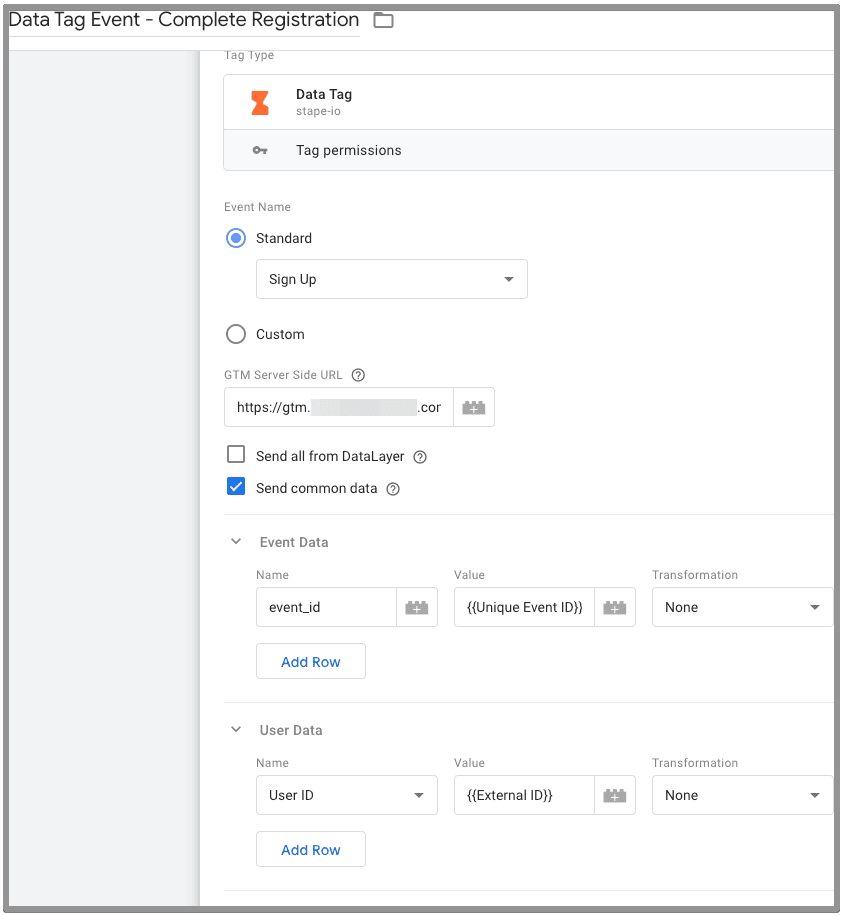
You can add other events similarly.
Now we are done with the web container, let’s go to the server container where we will add tags.
Send Data from Server Container
Download the data client template and upload as a template under GTM server container.
Once you upload the template, go to clients, create a new client, from the client configuration, select Data Client.
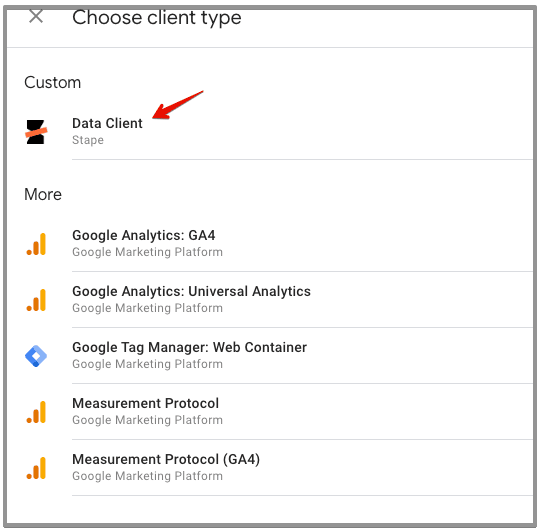
Rename the client as Data Client and save it.
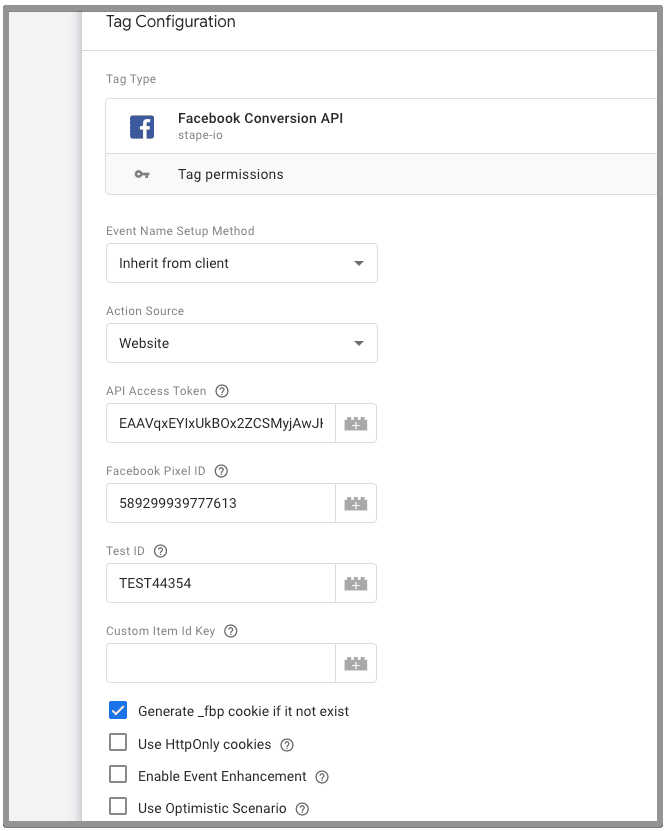
Next navigate to tags, create a new tag and from the template gallery import the Facebook Conversion API template by stape.
Add pixel id, api token and test id.
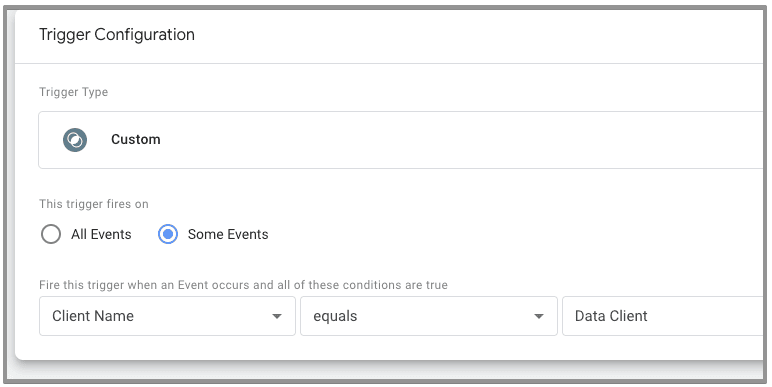
Set the trigger as below
Testing & Verifying FB Conversion API Installation
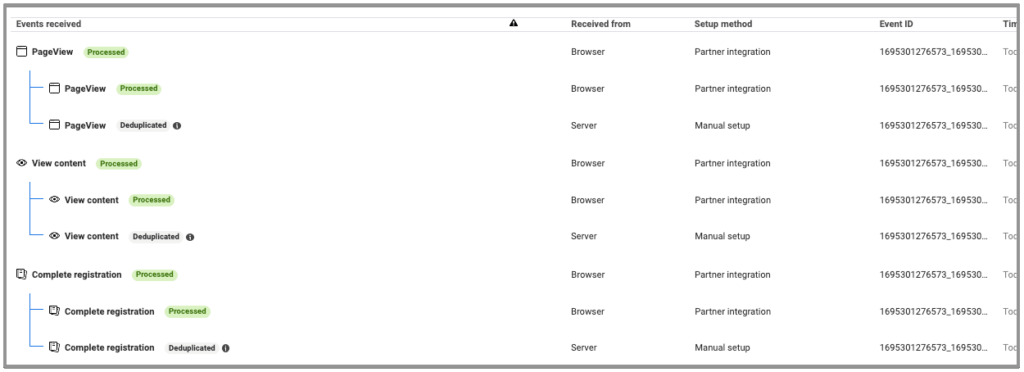
Now it’s time to test everything and make sure it’s working as expected. Preview the GTM server container as well as web container.
If you have done everything correctly, you will be able to see the results correctly. In the below picture you can see the events with same event ids are deduplicated.
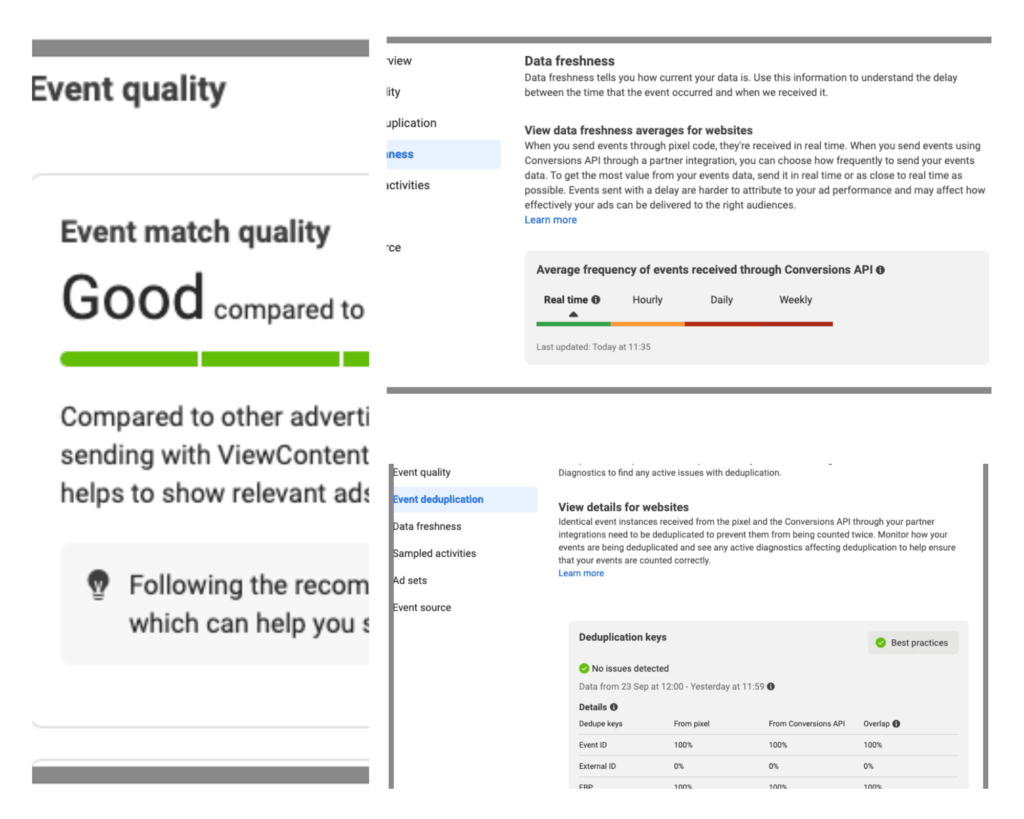
Once the testing is done, you can publish both the containers. Wait for a few days to see the capi data where you can see event match quality & data freshness.
Results:
After few days you can see the results of your CAPI implementation.
Regularly monitor your conversions and use the data you collect to tweak your Facebook ad campaigns. Let the insights guide your strategy for even better results.
In a nutshell, the Facebook Conversion API is a potent tool that can turbocharge your ad tracking and optimization. By using Google Tag Manager to set it up, you’re streamlining the process and putting this fantastic resource to work for your business. Embrace this innovation for more accurate and privacy-friendly ad campaign tracking, and watch your digital marketing efforts thrive.
If you want us to take care of your FB Conversion API setup, get in touch with us now.
Related Posts